
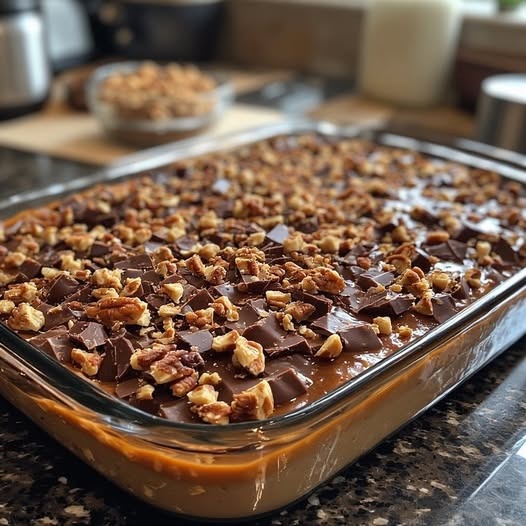
Step 7: Lift, Slice, and Serve
Once fully chilled and set, use the foil overhang to lift the entire slab cleanly out of the pan and onto a cutting board. Use a sharp knife to cut into bars of your desired size. These taste best served cold or at cool room temperature — the layers stay intact and the texture is at its absolute finest when properly chilled.
Tips for Perfect Results
- Stir the caramel constantly during the full 5 minutes of boiling — this is the most important step and cannot be rushed or skipped. Constant stirring prevents burning and ensures a smooth, even caramel throughout
- Work quickly when spreading the caramel — it firms up fast as it cools, so have your next cracker layer ready to go before you begin pouring
- Use real butter, not margarine — it produces a richer, more flavorful caramel with a better texture
- Line the pan with foil — this is non-negotiable for easy removal. Bars made without foil are extremely difficult to remove in one piece
- Chill fully before slicing — cutting too early results in the layers sliding apart. A properly chilled bar slices cleanly and holds its shape beautifully
Variations and Customizations
- Saltine or graham cracker base: Both make excellent substitutes for club crackers and produce a slightly different but equally delicious crunch
- All chocolate topping: Skip the butterscotch chips and use all chocolate chips for a more intense chocolate flavor
- Add a sprinkle of sea salt: A light dusting of flaky sea salt over the warm chocolate topping before chilling creates a wonderful sweet-salty contrast
- Add crushed pretzels or nuts: Press chopped peanuts, pecans, or small pretzel pieces into the chocolate topping before it sets for added texture and visual appeal
- Use dark chocolate chips: Swap the semi-sweet chips for dark chocolate for a more sophisticated, less sweet result
- Nut-free version: Use sunflower seed butter instead of peanut butter for a nut-free alternative that works beautifully
Storage Instructions
Store the finished bars in an airtight container in the refrigerator for up to 1 week. Place a sheet of wax paper or parchment between layers if stacking to prevent the bars from sticking together. They actually taste better on day two and three as the flavors continue to meld and the layers soften slightly into each other.
For longer storage, these bars freeze beautifully. Wrap individual bars tightly in plastic wrap, place in a freezer bag, and freeze for up to 3 months. Thaw in the refrigerator overnight before serving. You can also enjoy them partially frozen for an extra-firm, almost candy-bar-like texture.
Final Thoughts
These No-Bake Caramel Chocolate Crunch Bars are the kind of recipe that becomes a household staple the very first time you make them. They are ridiculously easy, deeply satisfying, and made entirely from ingredients you almost certainly already have in your pantry. The combination of buttery caramel, crunchy crackers, and that silky chocolate-peanut butter topping is genuinely one of the most irresistible flavor combinations in the dessert world. Make them once for a gathering and watch them disappear — then get ready to write the recipe out by hand for at least three people before the evening is over.
